Save Time with Named Character References
We've had character references in Midjourney for a couple of weeks already, but there's still so much to unpack.
Many people still aren't harnessing the full power of this new feature. You might even be surprised to hear that Discord gives you a distinct edge when working with the --cref parameter.
That's right, Discord is useful for a change! I never thought I'd say it but it's true. Unlike the Alpha Web UI, Discord lets you create named character references.
You can easily use these named references over and over again without having to copy and paste the image URL every time. This is particularly useful when you're working on images that contain multiple characters.
Curious to learn how this can be done? Then keep reading.
Creating Character References
Before anything else, we first need to create our characters. For this example, I'm going to work with a young man and a woman. Our male character – let's call him Carlos – is going to be a 35-year old Spaniard with curly hair.
Here's the prompt I used to create him:
                                /imagine
 Portrait photo of a 35 year old Spanish man with brown curly hair. The man is wearing white AirPods. He is wearing a maroon running shirt with yellow stripes. The surrounding area is a park.
--style raw --ar 4:5 --stylize 150
 Midjourney prompt for a 35-year-old Spanish man
Next, we'll create Anna, a 25-year old Scandinavian woman with blonde hair.
Her prompt looks like this:
                                /imagine
 Portrait photo of a 25 year old Scandinavian woman with long blonde hair. The woman is large black Bose headphones. She is wearing a bright turquoise running shirt. The surrounding area is a park.
--style raw --ar 4:5 --stylize 150
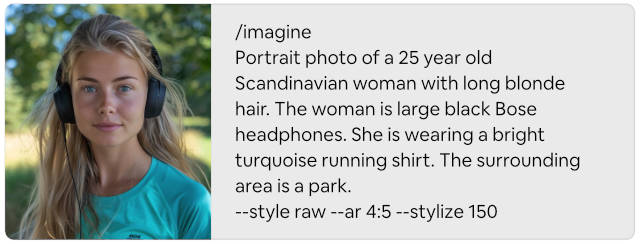 Midjourney prompt for a 25-year-old Scandinavian woman
I've made sure that both of them are wearing sports clothes because they'll be jogging in our scene. But before we get to that step, let's first define our named character references.
Setting Up Named References
For this step, we're going to use a very useful feature that's available in Discord but not in the Web UI. We're going to use custom options. If you've never heard of custom options then you're missing out and it's one of the many tricks that I also teach in my course Masters of Midjourney.
Defining a custom option is very easy. The command looks like this:
                                /prefer
 option set name value
So if I wanted to set up a named character reference for Carlos, I would do it like this:
                                /prefer
 option set carlos https://s.mj.run/GMwaQBv0Jt4
And for Anna, you simply replace the name and the URL:
                                /prefer
 option set anna https://s.mj.run/d1uwHdMOkQ8
If you're familiar with custom options then you probably already see the beauty of this little trick. You won't have to copy and paste those image URLs anymore. Custom options can be inserted into any prompt in Midjourney – as long as you're using Discord – and it's unbelievably simple.
Here's an example:
                                /imagine
 Photo of a man running across London Bridge
--cref --carlos
You insert your named reference by prefixing the name (in this case carlos) with two dashes (--). When you submit the command, the Midjourney bot will replace the "--carlos" with the image URL that you set.
So the command that I shared above resolves to this:
                                /imagine
 Photo of a man running across London Bridge
--cref https://s.mj.run/GMwaQBv0Jt4
Neat, isn't it? This becomes particularly useful when working with multi-character scenes.
Inpainting Multiple Characters
Let's say I wanted to place Anna and Carlos in a scene in a park. Rather than trying to create the full scene with a straight prompt, let's do with character references instead.
To demonstrate this, I've created a generic scene of a man and a woman running through a park:
                                /imagine
 Close up of a young man and a woman jogging side-by-side through Hyde Park in London.
--ar 16:9 --style raw --stylize 150
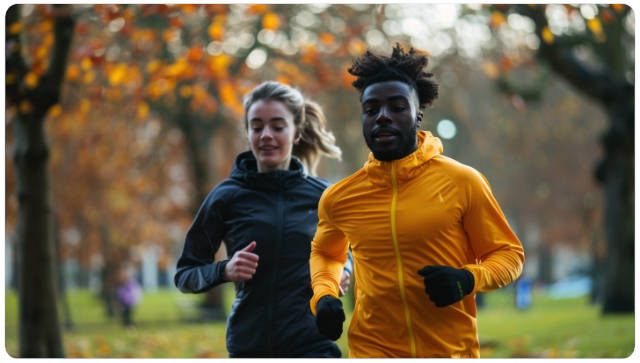 Midjourney image of a man and a woman jogging through Hyde Park
As you can see, these two characters look nothing like Anna or Carlos. But we can change that very easily. Simply click the Vary (Region) button and select the male character with the lasso tool.
 Example of Inpainting in Midjourney using the Vary Region feature to replace a character.
Then add the --cref parameter to the prompt, followed by character reference --carlos. We don't need to make any other changes to the prompt because it already takes into account the context of the image.
Now that we've successfully placed Carlos into the image, let's do the same for Anna. Once again, click Vary (Region) and use the lasso tool to select the woman.
 Example of Inpainting in Midjourney using the Vary Region feature to replace a second character.
Then replace --carlos with --anna and you're done. What you get is the same scene but now with our two original characters.
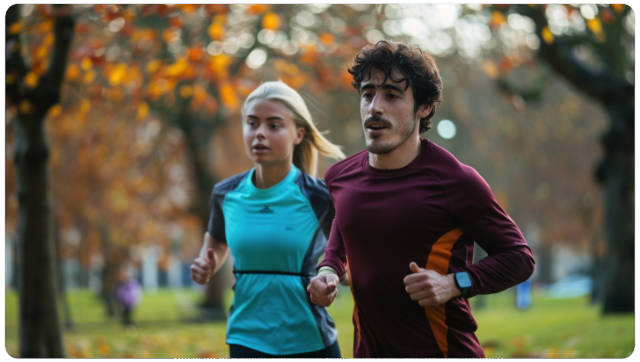 Midjourney image with character references inserted via Inpainting.
Some Caveats
I already know what some of you are thinking.
"But they don't look anything like my reference image!"
So, first of all, that's not entirely true. It's a bit unfair to say that they don't look anything like the reference images. Are they pixel-perfect representations? No. But are they close enough for most use cases? Absolutely. I've mentioned these caveats in one of my newsletters a few weeks ago.
Personally, the way I approach this is like this:
- Don't obsess over your original character reference.
- Settle on a reference that produces a character that you are sufficiently happy with.
- Ensure that Midjourney produces consistent representations of that character (albeit not 100% identical to your reference).
- Work with Midjourney's interpretation.
I know that many of you may not be satisfied with this approach but you're not going to get anywhere unless to compromise at this stage. Midjourney doesn't "see" what you see. It interprets your reference in a particular way and that's not going to change anytime soon.
Embrace this and you'll become a lot more productive.
I hope you enjoyed this neat little trick.
That's it for this week. See you next Saturday!
